
Today I want to talk about a product that is relatively unknown but SO very much fun to play with. It's the Faux Mosaic Kit by Tera Leigh which is made by Ranger.
Faux Mosaic Tiles you might be asking...why not just use real ones and what would I use them for anyway?!?! Well, trust me ~ this is a fun and very easy to use product. You can turn plain everyday items into amazing pieces of faux tiled creations! It is light weight, easy to work with and all you need is the kit, some paper and something to tile! This project does take a bit of time because you will have dry times to contend with the end product is well worth the effort!
A little bit about the kit it's self. Each kit comes with 3 components, the faux "grout", faux mosaic glue & faux mosaic glaze. If you've ever tiled a floor or worked with tile mosaics you know you adhere the tiles first then grout. With this kit you will be working backwards. You will start with the grout, lay your tiles and finally glaze each tile. Don't worry...no need to remember which jar you use first. Each jar is marked 1, 2 or 3 for each step.
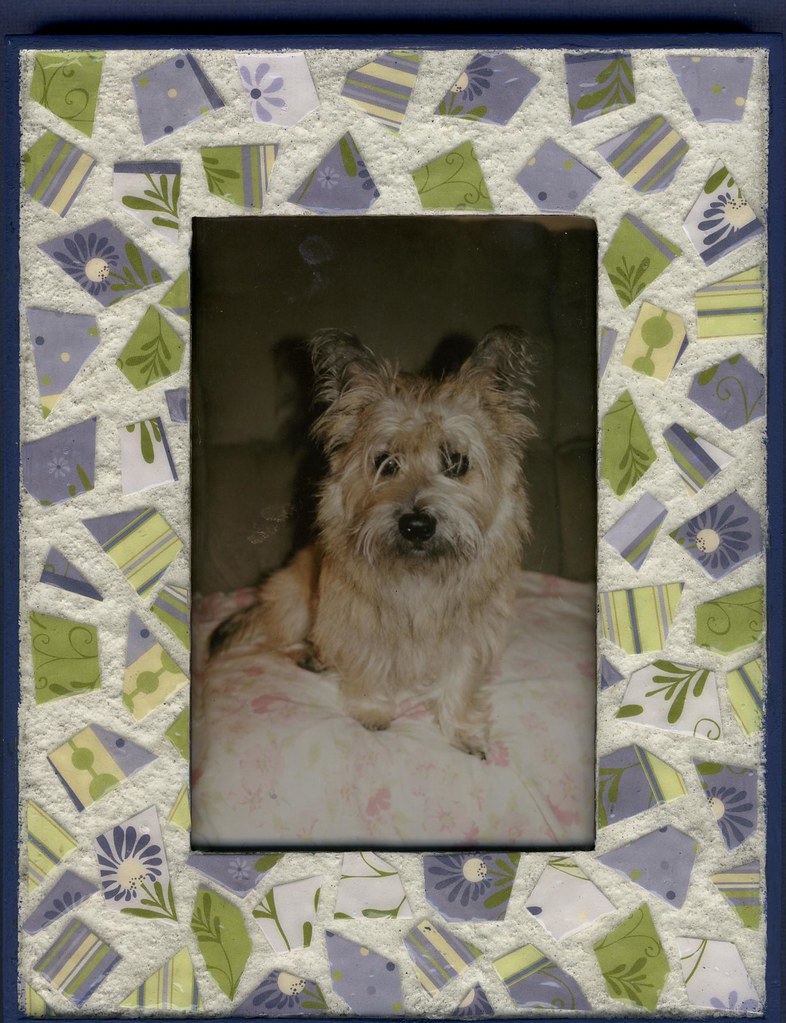
Here is a finished example of a frame* made for a friend using the kit. It was a plain wooden frame that can be found at any craft store but it doesn't necessarily. have to be an unfinished frame. You can take virtually any wood frame to tile.
*Tomorrow I will share additional examples of items that can be tiled as well ;)
Faux Mosaic Tiles you might be asking...why not just use real ones and what would I use them for anyway?!?! Well, trust me ~ this is a fun and very easy to use product. You can turn plain everyday items into amazing pieces of faux tiled creations! It is light weight, easy to work with and all you need is the kit, some paper and something to tile! This project does take a bit of time because you will have dry times to contend with the end product is well worth the effort!
A little bit about the kit it's self. Each kit comes with 3 components, the faux "grout", faux mosaic glue & faux mosaic glaze. If you've ever tiled a floor or worked with tile mosaics you know you adhere the tiles first then grout. With this kit you will be working backwards. You will start with the grout, lay your tiles and finally glaze each tile. Don't worry...no need to remember which jar you use first. Each jar is marked 1, 2 or 3 for each step.
Here is a finished example of a frame* made for a friend using the kit. It was a plain wooden frame that can be found at any craft store but it doesn't necessarily. have to be an unfinished frame. You can take virtually any wood frame to tile.
*Tomorrow I will share additional examples of items that can be tiled as well ;)
 Let's begin....
Supplies:
Faux Mosaic Tile Kit - Ranger
2 Brushes ~ at least one disposable.
Pattern Paper - for the example I used paper from the Heidi Grace Collection
Wood Frame (or other object)
Paint (optional)
Protected Work Surface
Instructions:
1. You will need to cover & protect your work surface. If you're like me once you get into the project you get a little wild and forget about being careful where you lay down your brush. I have found more than one brush stuck to my desk...or me for that matter ;)
2. Prepare your frame. Prepare it how? Well, if you are using an unfinished frame you will need to initially paint any surface that you don't want to tile. If you are using a finished frame and no additional color is desired you can skip this step.
For the frame in the example, I painted the edges Denim using Ranger Acrylic Paint Dabbers. The great thing about the Dabbers is there is no need for a brush! Simply dab it on :) Set aside to dry.
3. Once the paint has dried it's time to Grout! Open the jar of grout, it is marked #1. With a disposable brush pick up a good amount of grout and plop it onto the surface to be tiled. Now, start spreading out the grout. You want to make sure you have a good layer on your project. As the grout dries and the moisture evaporates you will end up with a thinner coat so this is the time to make sure you have enough on the surface.
As you are applying the grout, no need to be dainty. Just push it around until the surface to be tiled is completely covered. No need to smooth it out, a more textured look is what you're going for. To ensure a natural look on your finished project I like to pounce my brush up and down over the grout as I'm working. This helps add interest and gives a bit more texture.
When you're satisfied with how the grout looks set it aside to dry. Depending on the temperature and humidity in your particular area it could take 2+ hours to dry. I normally toss the brush that I used for this step. You will notice that the grout has worked it's way through all of the bristles and it's virtually impossible to get it all out.
4. Now it is time to chop up your paper! When choosing the paper to cut your tiles keep in mind a couple things.... Try to stick with a few color choices....unless you're going for a really wild random look stick with 2-3 main colors. I like using coordinating pattern papers from a collection. That way I know it will all look great on the finished product. Be mindful of your pattern...I was cutting up paper I thought I wanted to use for a project but as I was cutting I noticed a foot here, a piece of a head there...well, you get the idea ~ it would have made a very odd looking finished project ;) Just something to keep in mind - LOL!!!
You will want to make sure you have lots of "tiles" cut so you don't have to take the time when you're adding the tiles to your project. It always bugs me to have to stop right in the middle of a project to cut more tiles.
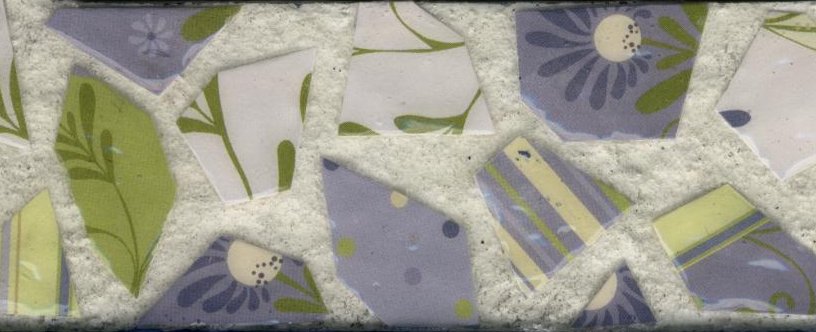
When you're cutting your "tiles" it's totally up to you if you want a more random edge as shown here or you may choose to cut the paper in squares, circles, etc. What ever shape you decide on just make sure you cut various sizes. You will need to piece them together in the area you are working on and it's best to have your options open on sizes**.
5. Once the faux mosaic grout is completely dry and you have a good amount of paper "tiles" cut you're ready for the next step. Using another brush (disposable or washable) you are going to start adhering the tiles onto the mosaic. This step is preformed basically like you would if you were going to decopage. Working in small areas (appox. 2"x 2"), apply a coat of the faux mosaic glue. Arrange your paper tiles and apply another coat of glue over the top. Continue to work over the entire surface until it has been covered with "tiles".
Note - some paper has a tendency to curl when it is wet...as you're working on applying the tiles, you will want to look back over the areas you have already applied the paper tiles and press down any tiles that may have a corner lifted off of the surface.
After you have covered your entire project with adhesive, set aside to dry.
6. You're ready for the last step in the process. Using the bottle of faux mosaic glaze, cover each tile completely. I find it easier if you outline the tile then fill in the center. Cover each tile with the glaze and set aside to dry.
Note: It is important not to pick up the tip applicator from the tile once you have started to apply the glaze. If you do you will most likely get air bubbles in the glaze. If this does happen you can take a pin and pop the air bubble or at the very least drag it off to the side. Trust me, those little buggers are at times hard to pop so it's best if you try to prevent it from happening. You'll save yourself alot of frustrations if you do ;)
You're done! Time to enjoy your handy work :)
With a little time and the faux mosaic kit you can create an amazing tiled piece of art without all the weight or work of real tiles!
These projects make great gifts for family or friends too!!
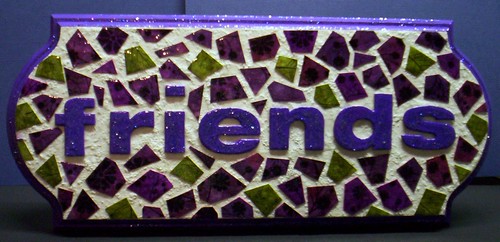
Here is another example to try. This is a Walnut Hollow plaque that can be found at most craft stores and some discount department stores. I painted the edge and the "Friends" Making Memories chipboard letters using Ranger Adirondack Acrylic Dabbers. The tiles in this case are actually bits of glossy cardstock that I had colored using Adirondack Alcohol Inks, Archival Jet Black Ink and Autumn Leaves Acrylic Stamps. I added Stickles Glitter Glue to the edges of the plaque and the chipboard letters for a little added bling.
Additional tips & ideas:
**You don't just have to use random cut pieces for your tiles, geometric shapes work well but think beyond that...pull out all those paper punches you've had in the bottom of your drawer for years! Try sprinkling various shapes in among your tiles! Better yet, maybe you could use punchies for your entire project!
Tomorrow I will show additional ideas of items that can be used as tiles with the kit.
- Try using hand made paper for your tiles. It will give an added dimension of texture to the tiles that you won't get using pattern paper. Maybe you could use a variety of papers to add interest!
Okay - I'll have to admit that I was thinking that those tiles were way better than the regular ol' glass tiles you see at the stores, not realizing you use paper to make your own. Love this idea!
ReplyDeleteLove the faux mosaic! My dd made several mosaic projects in high school (REAL mosaic) and I swear, you can't tell the difference between yours and hers!
ReplyDeleteThanks for posting the fabulous projects! I really appreciate you using the Faux Mosaic product!
ReplyDeleteTera Leigh